Got a shed out back you're looking to make more useful? Maybe you want to turn it into a workshop, a home office, or just a place to keep your tools from baking in the Glendale summer heat. Whatever the reason, insulating your shed is a smart move. It's not as complicated as insulating your whole house, but there are definitely some things you need to know before you jump in. I've seen plenty of sheds around Glendale, from the older ones in the historic Catlin Court area to the newer builds near Arrowhead Towne Center, and an uninsulated shed in our climate is just a hot box.
Before You Start: Planning Your Shed Insulation Project
First off, what's the shed for? That's going to dictate how much insulation you really need. If you're just storing lawnmowers and rakes, you might not need a full-blown, climate-controlled setup. But if you're planning on spending hours in there, working on projects or taking calls, you'll definitely want something more substantial. Think about whether you'll be adding heating or cooling too, because that changes the game entirely.
Next, take a good look at your shed's structure. Is it old and drafty? You'll need to seal up any gaps or cracks before you even think about insulation. Caulk around windows and doors, and use expanding foam for larger holes. You don't want to insulate over a draft; that's just wasting your time and money. Check the roof for leaks too. Insulation won't do you any good if it's getting soaked every time we get a monsoon.
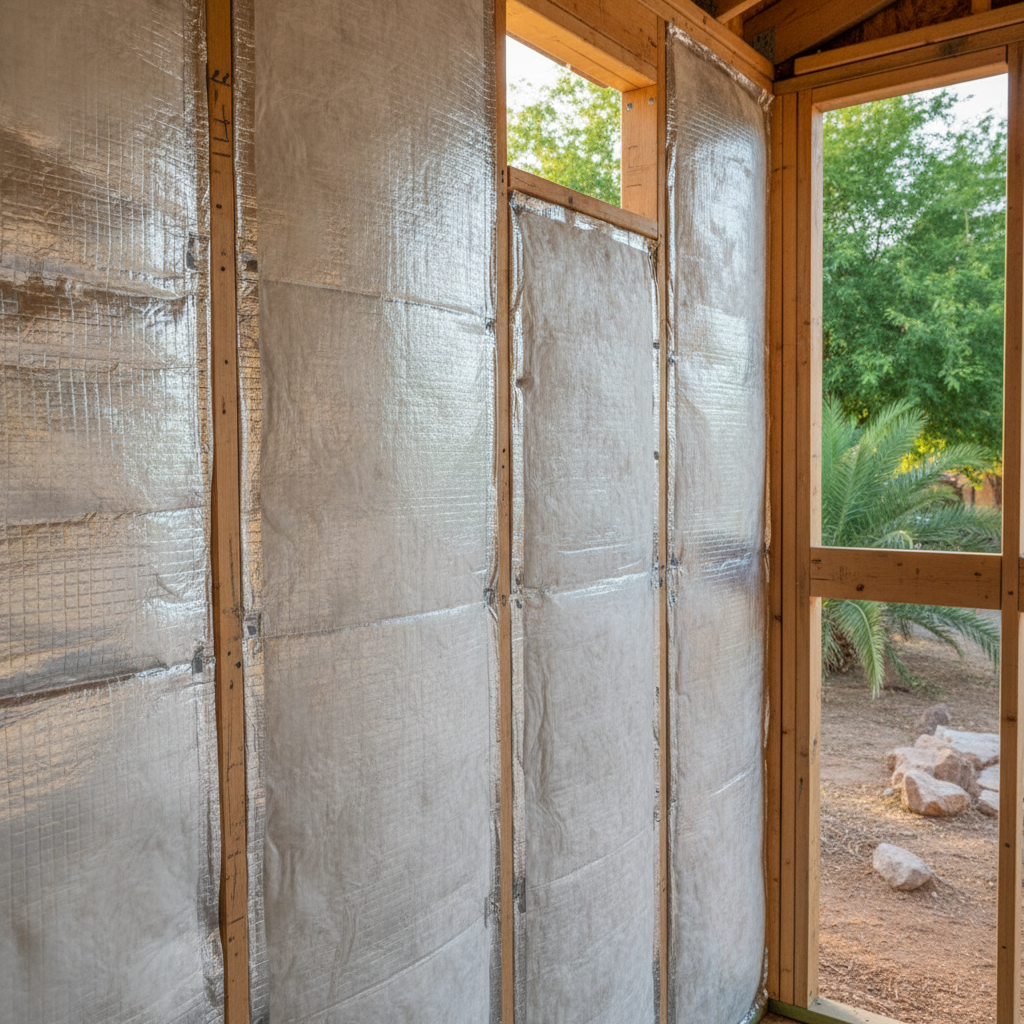
You'll also need to decide on your insulation material. For sheds, you've got a few common options. Fiberglass batts are popular because they're relatively inexpensive and easy to install yourself. Just make sure you wear protective gear – gloves, long sleeves, and a good mask. Rigid foam boards are another great DIY option; they offer good R-value for their thickness and are easy to cut and fit. Then there's spray foam. Now, for a small shed, you *can* get DIY spray foam kits. They're usually two-part cans that mix as you spray. They work, but they can be tricky to get right, especially if you've never used them before. If you're looking for the absolute best performance and a perfect seal, especially in our extreme heat, that's when you might consider calling in a pro like us at Glendale Spray Foam Insulation. We can get you that consistent, high-R-value seal that's tough to beat with a DIY kit.
During the Project: Installation Tips
Alright, you've prepped, you've picked your material. Time to get to work. For fiberglass batts, measure your wall cavities and cut the batts to fit snugly. Don't compress them too much; insulation works by trapping air, and squishing it reduces its effectiveness. Staple the facing (if it has it) to the studs. For rigid foam boards, cut them to fit tightly between studs, rafters, and joists. You can use construction adhesive or screws with large washers to hold them in place. Seal all the seams with foil tape or caulk to prevent air leakage.
Don't forget the ceiling and floor! Many people only think about the walls, but heat rises, and a lot of it can escape (or enter) through an uninsulated roof. For the floor, especially if your shed is on skids or a raised foundation, insulating underneath can make a huge difference. You might use rigid foam boards or even some moisture-resistant batts if you can protect them from critters and moisture.
Ventilation is key, especially here in Glendale. Even with insulation, if you don't have proper airflow, you'll end up with a stuffy, potentially moldy shed. Consider adding vents, like gable vents or a ridge vent, to allow hot air to escape. If you're planning on heating or cooling the space, you'll want to make sure your insulation and sealing are top-notch to keep that conditioned air where it belongs.
After It's Done: Maintenance and Enjoyment
Once your insulation is in, you'll notice a difference right away. The shed will be much more comfortable. But the job isn't completely over. You'll want to keep an eye on things. Check for any signs of moisture intrusion, especially after heavy rains. Look for pests trying to make a home in your new cozy space. Seal up any new gaps you find.
If you used spray foam, it's pretty much maintenance-free once it's cured. That's one of the big advantages. For other materials, just make sure they stay dry and undisturbed. An insulated shed isn't just about comfort; it also protects your stored items from extreme temperature swings, which can be brutal on tools, paints, and other sensitive materials. You've just upgraded your backyard space big time. Enjoy it!